
Are you planning to organize your music bank in a definitive way and make it ready to be digested by Kodi scraper?
Then you need a proper schema to tag everything effectively without spending ages to check your work manually.
I will also use some odd examples to enter into the details of Picard processes to explain you how to prevent some common mistakes that get unseen and wrongly accepted in bulk renames of big music archives.
When it comes to music files, songs, albums, playlist and the like it all reverts into the so called tagging quest. Files need to have a proper name so you can navigate in the filesystem easily in a typically manual fashion.
But Kodi does not use filenames to populate your library, but the metadata embedded in the files instead.
So, all those files need to be equipped with the necessary information to be fetched correctly. The more information your file have the more precisely they will be shown in your library.
If you converted all your CDs of the past into a more manageable and portable electronic format, no information is included yet into the mp3 (or any other equivalent format).
MusicBrainz Picard comes at help to accomplish this task in a matter of minutes (or hours, depending on the dimension of your music bank). Actually the official Kodi forum advises to use Musicbrainz to tag everything correctly.
A quick digression on Kodi way of doing things.
Kodi allows you to store information about your albums and songs in so called .nfo files (simply text files with some data inside) and optionally to download additional information like lyrics and fan art to be shown on the graphical user interface of Kodi. To allow all this magic to happen (and also to have most of the Kodi addons to work properly) the filesystem structure containing your music shall be structured as follows:
- source
- 1 artist
- 1.1 album
- 1.1.1 disk
- 1.1 album
- 1 artist
The first level is called source, in practice it is a folder given to Kodi to represent a portion of your music library. You can have one or more sources (suppose you have divided your entire music bank in genres or some other subdivisions that make sense to you).
The folders (directories) in a source shall be referring to artists (or compilations in case of Various Artists).
Each artist folder shall then be subdivided into Albums and each album (represented again by a directory) shall contain music files. There can be a fourth level of grouping for all such albums that are made of more than one disk.
When you add music to your Kodi library, the software will process it two passages: scanning first and then scraping.
Scanning is the process of reading an entire source, recording each piece of information contained and filling up Kodi’s database. Once the database is being populated, Kodi will not access any file metadata any longer (up to the next scan, that is normally manually imposed).
Then scraping occurs.
Scraping is actually not touching your sources, but in practice it is the retrieval of additional information, such fan art, from internet sources. The search that kodi performs on such online data banks is based on the data coming from the scanning phase. The most common internet database is Musicbrainz. This is why Musicbrainz Picard is the preferred choice to tag everything.
Once you are finished processing all your songs with Picard, you can be almost sure Kodi will interpret your music the way you are expecting.
Kodi reads a lot of tags embedded into audio files but all of them. In particular, different audio formats contain different tags or tags are named differently. To have a clear overview of what is going to be read by Kodi, refer to the official forum.
So let’s arrive to the real task, tagging everything the way it should be.
Step 1: Install MusicBrainz Picard on your PC.
This is an easy task. Depending on the operating system you are using you can find installation media on the official website. Most common Linux distribution ship with the most updated version available in their repositories directly. Mint 19 for sure has it and I use it without troubles.
Step 2: make a copy of your music databank somewhere.
Backing everything up before modifying it sounds like a good idea. Who knows? You can always delete the original copy when your done with tagging).
I suppose you are on Linux (if you are on windows, things are very similar, only path naming differs as in Linux there is no C:/ but an absolute path starting with / instead).
I will suppose your original music resides on /music/backup and its clone on which you will operate is in /music/old.
Create a new additional empty directory called /music/new on which we will move each modified file.
Step 3: be sure of what you have in your archive
You can have really a lot of songs, depending of the dimension of your music archive you can have strange things, rare rarities, corrupted albums, incomplete ones and the like. This is going to bring you troubles when tagging, but it is likely unavoidable in big collections (when I say big I mean something like hundred Gb or even Tb).
It is also possible that you ended up with more versions of the same album, I make you an example.
I am a fan of AC/DC. Scott and crew started with Albert Productions in Australia in the early seventies.
Their first album is High Voltage, released in ‘75 featuring 8 songs. It took me 8 years to find a copy of that long playing but eventually I found a second hand original Albert version in the early nineties. It also costed me a fortune but this is another story.
The same year they released TNT, again with Albert Production marketed in Astralia only. Nine tracks.
In ‘76 finally AC/DC got a contract with Atlantic and High Voltage got reissued internationally. Angus Young ended up over the disc cover and the album was featuring nine tracks, a mix of the first two Australian albums but the structure and song sequence was very close to the one of ‘75 TNT LP.
This can be a real mess in Picard. If you don’t pick the right one you will end up with all songs shuffled and renamed randomly.
You should not drink everything that is offered to you. Picard tries to find the best matching database entry, grounding the research on several parameters discussed earlier, but it can make mistakes and it normally does. So check everything before clicking Rename.
Step 4: make a renaming and tagging plan.
The entire process can be long. Hours. It actually took days to me. So better you move in a Cartesian way and jot down all odds you encounter on your way to be sure you take everything into due account.
If you have 100 albums all these precautions may be excessive, but if your figures are close to the thousand instead, this advice comes handy and wise.
On the other side, in the majority of cases, mistakes convert in loss of data.
My strategy is to proceed in separate trenches, one for each artist you have, tag and scrape all of his production and then pass to the next artist and never mix two artists together.
This is not said to be 100% error proof, as you can have half of your Sting discography under Sting directory and the other half under Police or something similar. If you do that section in two different times and you don’t keep track of the name used to tag the Artist info in your files, you are likely to end up with two different library entries in Kodi.
Proceeding on this way it is not even said to be slower. In fact Picard allows you to run more instances of the software at the same time and each instance behaves separatedly from the others, segregating data and threads. You can prepare one scraping/renaming launch on the first instance, let it go and prepare the next one on a second instance for the next artist to come, saving your time efficiently.
Another nerd but valuable note on really huge archives: if your music vault resides on a remote disk (a NAS or some kind of space not directly attached to the machine running Picard) you should consider with due attention the moving time.
My personal experience is that the sum of a rename plus tag inclusion into a file costs much more than a simple file move on the filesystem. The time is much closer to a full rewrite of the audio file, so if you are on a lan connection the renaming process will take quite a while.
In such a case, better you plan to move the data bank on your local filesystem. If it is too big to reside entirely on your pc, you can think of slicing it into pieces (for example artist by artist) to make it more manageable. If you are planning to rename everything on a nfs share, think it twice before starting.
Step 5: The Picard Show
Let us start Picard application. Here you can find the user interface running in Linux.
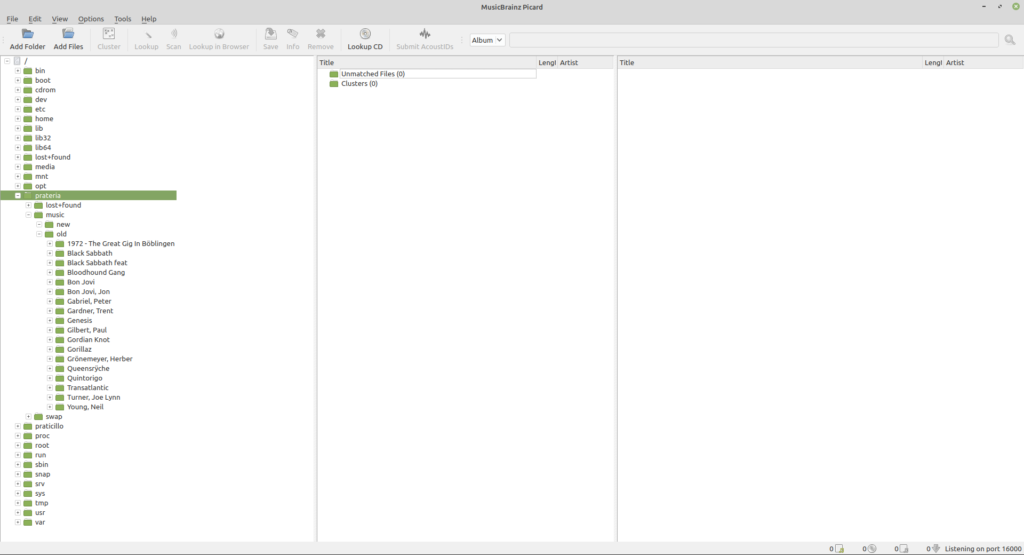
Picard main screen is divided in three sections that resemble the logic workflow during the tagging process.
At the most left side you have a sort of file manager, showing your hard drive and its contents.
We will work in a folder called music/old as decribed above and will tag the files contained therein and them move it automatically to music/new.
I want the music/new folder being subdivided also for initial letter name, so that Genesis stuff will end up in music/new/G/Genesis/.
This is not really necessary for Kodi but it comes handy when you have a real wide archive and you sometime use dlna enabled devices to reproduce your audio. For example, sometime I play music in the bedroom using my TV, navigating down to ZZ Top on the fly with the TV remove becomes an almost impossible task. This additional subdivision implements the divide et impera logic for cutting efficiently the traversing time of the entire archive. At the same time Kodi and other more clever equipment won’t get affected.
In the center section of the screen you will see the songs that you want to be processed. My way of using Picard is to select the folder on the file manager (left column) and drag it into the center column.
In the most right section you will see matches found on the Musicbrainz database populating the area.
Before starting the show, better we give a look at the options that the software provides and set everything up correctly to get where we want to go.
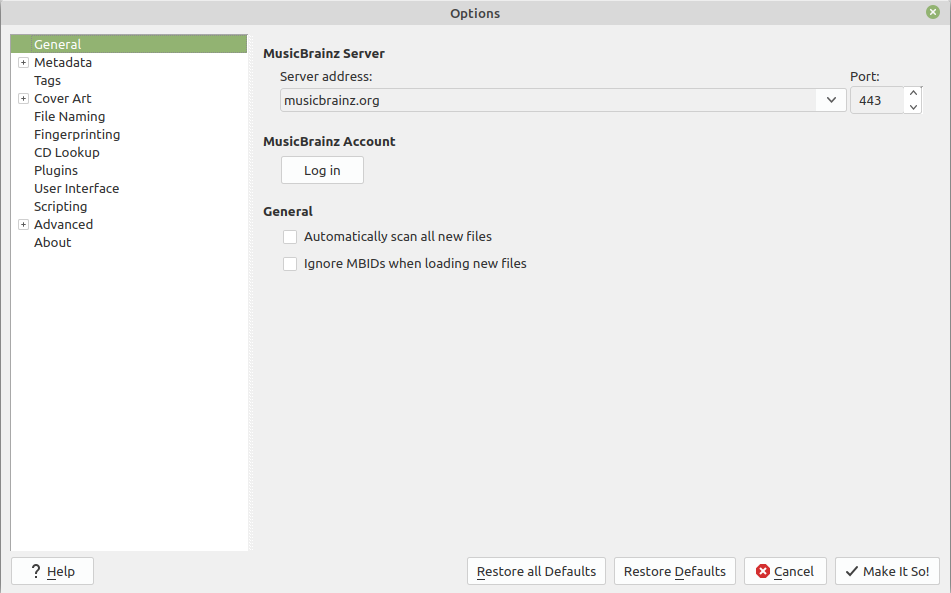
Step 6: Set Picard options the right way
Let us go to Option menu and choose Options again. You will see a window opening similar to this:
Feel free to make experiments with the options but consider the following notes.
On the tag section you will see the following options
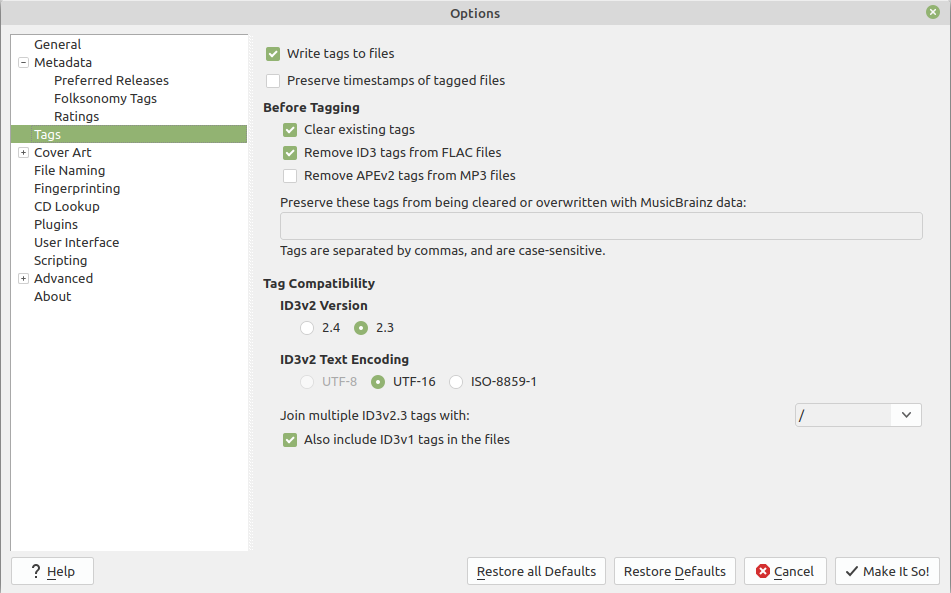
It is always a good idea to cancel all the previous tags if they do not pertain to any previous work of yours or if you don’t trust 100% the information contained in your files.
So, flag all the option to remove all previous tags from any kind of file format. Check also that the “Write tags to file” is checked and you may consider also to flag the option to preserve timestamps. On the contrary Picard will update the file timestamps relevant to the “Last Modified” field to the current time of the update. The creation time will be preserved in any case.
On the File Naming section you can include the way files shall be moved/renamed during the tagging process.
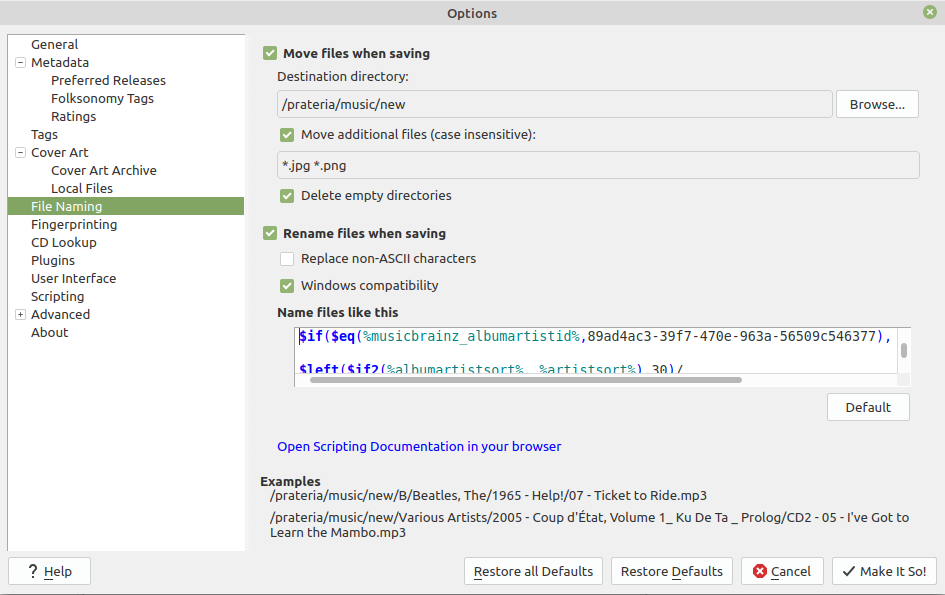
By default, Picard does not rename files, it just adds tags to the file (it can also embed other files in the audio file, as the fan art for example. Check the Cover Art section and the relevant original documentation).
You can ask Picard to move your processed files in this section by enabling “Move Files when Saving”.
You can also specify the directory where the files will be moved into.
In this area you also specify the way your files shall be renamed.
My personal script is the following
$if($eq(%musicbrainz_albumartistid%,89ad4ac3-39f7-470e-963a-56509c546377),
    $left($if2(%albumartistsort%, %artistsort%),30)
            /
    $if(%date%,$left(%date%,4)) - $left(%album%,40)
            /
    $if($gt(%totaldiscs%,1),$if2(%media%,CD)%discnumber% - ,)$num(%tracknumber%,2) - $left(%title%,30),
    $upper($firstalphachar($if2(%albumartistsort%, %artistsort%),#))
    /
            $left($if2(%albumartistsort%, %artistsort%),18)
            /
    $if(%date%,$left(%date%,4)) - $left(%album%,40)
            /
    $if($gt(%totaldiscs%,1),$if2(%media%,CD)%discnumber% - ,)
            $num(%tracknumber%,2) - $left(%title%,30)
    )
Scripting deserves an entire separate explanation that exceeds the scope of this article. You can find anyway a very precise explanation here.
This script separates does the following tasks:
- creates the initial subdivision based on the first letter of the Artist Name,
- then creates the artist folder (using the artist name tag). Without a good match the stuff will end up in the Various Artist directory;
- then it creates the folder for the specific album in the format YYYY – album name;
- then it takes into accoun multi disk releases;
- finally renames the tracks in the format track number (max 2 characters) – track name (max 30 characters).
As an example, this is Innuendo absolute path in my archive:
music/Q/Queen/2015 – Innuendo/01 – Innuendo.flac
Then there is a section related to plugins. There is a variety that you can test. I find very useful the one to create automatically M3U playlists.
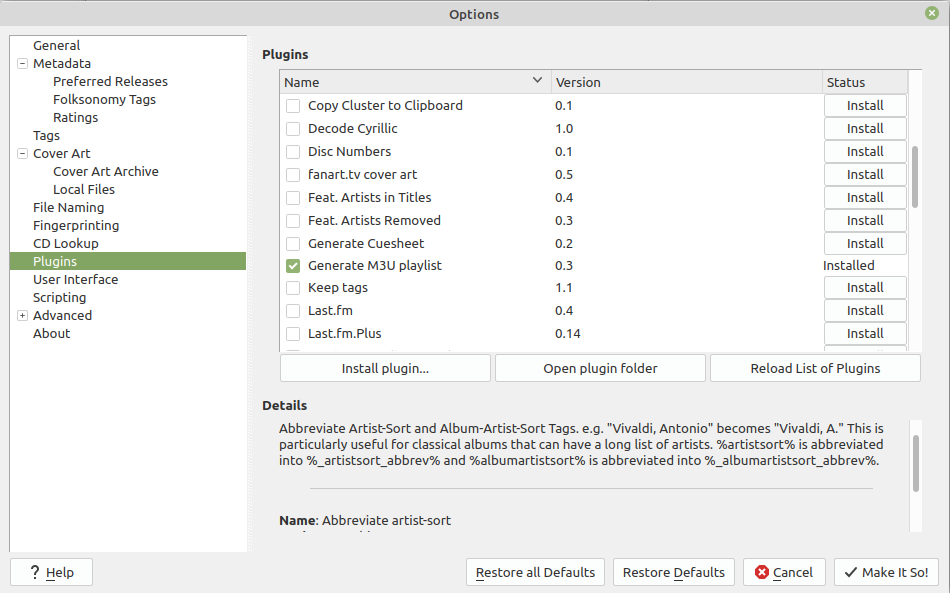
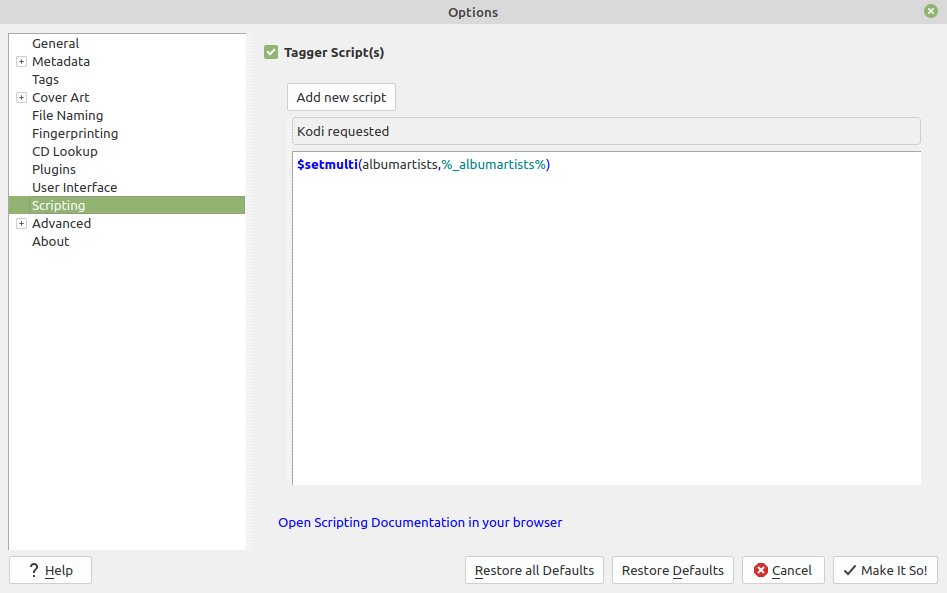
Then, as described in the original Wiki page of Kodi you should add a script as indicated in the picture below.
At this stage, you are ready to go.
Step 7:Start scraping your files
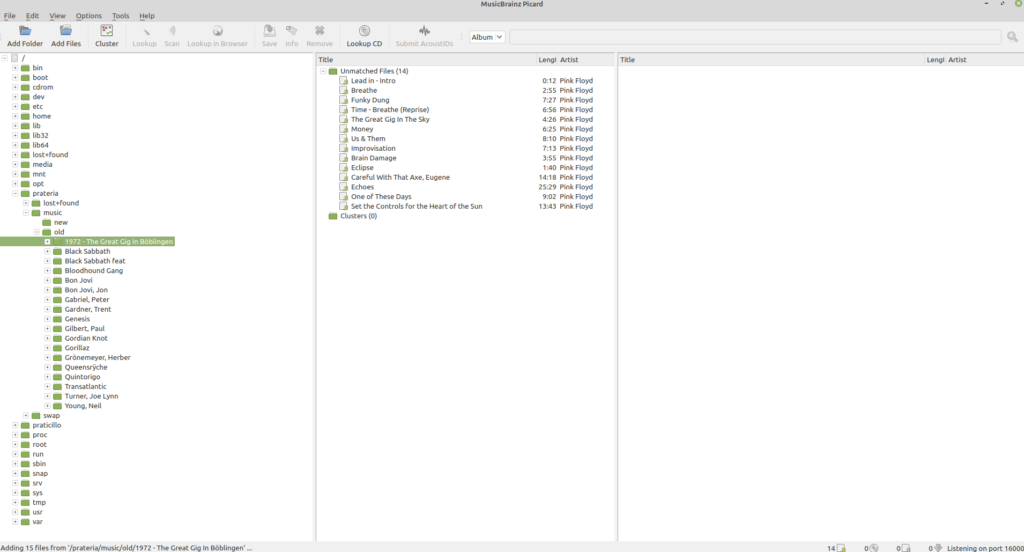
Drag the first album folder or artist folder from the left navigation menu to the central column. You will see the unmatched group being populated by as many files as in original folder.
Selecting the unmatched group folder in the central section several icons in the main Picard bar will get active, allowing you to lookup or scan the files.
The lookup function tries to match the information available in your files with the MusicBrainz database online. This search is performed using any existing metadata (before canceling everything if you flagged the relevant feature in the options panel) and the filename as originally written in your archive.
The scan function bases the search on the audio fingerprint of the file. The file get analyzed and compared with the fingerprints stored on Musicbrainz database.
There is also a third option that get available after one of the first two have failed in finding a match that is called manual Lookup. You be alloed to navigate the entire database via web and find the best match manually. You will then press the green Tagger icon on the web browser and your Picard instance will fetch the relevant information and forse your unmatched files to get coupled with the titles you have chosen. Remember that this automatic interlink between Picard and the web page is working only when the browser is opened by the relevant button in Picard bar called “Lookup in Browser”. You cant manually pen you browser and transfer information in this manner if you have more than one Picard instance opened at the same time.
Pressing on the Lookup icon, Picard will start looking at the files and finding its proposal for you.

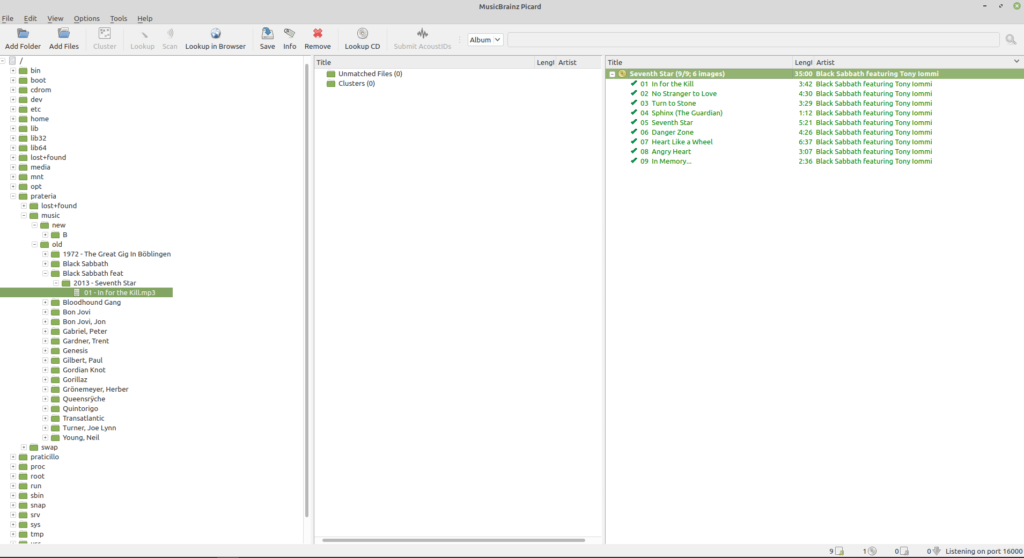
In this example the Black Sabbath Album seventh Star is matched immediately after having dragged it into the central column.
The original folder contains a double copy of one song, correctly matched to the same entry. Just delete one of the two and let the other being used for the final rename.
As you can see, the green rectangle informs you that the match is considered very close and you can safely accept it.
After you remove the redundant copy of in for the Kill, the entire album turns to gold, informing you that the Release is complete and can be safely saved, including new metadata and (optionally) renamed to the new destination.
If you press the the Save button everything will be renamed as required, but not where we expect it to go. In fact the Artis is not going to be Black Sabbath, but Black Sabbath featuring Tony Iommi.
Considering that the script described above will take only 18 characters of the artist name the final directory will be “Black Sabbath feat” only.
The fastest way to fix this is to let Picard rename it this way and then move the output in the correct (Black Sabbath) directory.
So press the Save button to obtain a green flag aside every file.
Then, if you navigate with your file browser to the destination folder you will see this following output.
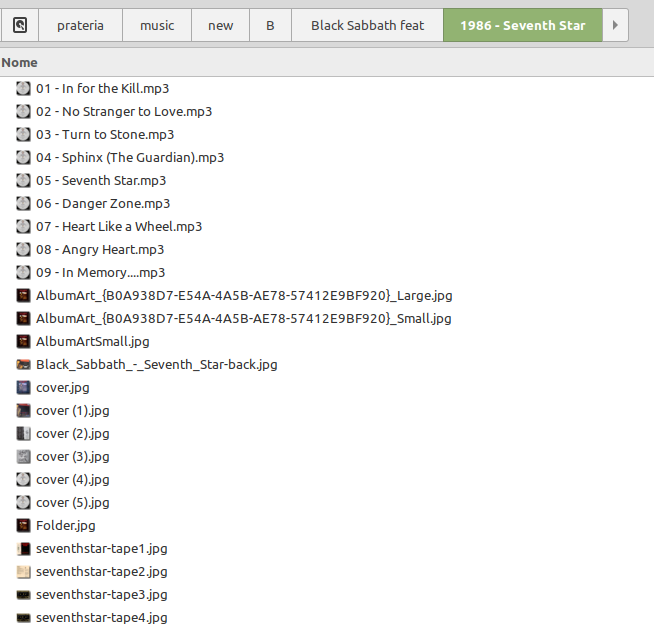
All the files have been moved to music/B/Black Sabbath feat/1986 – Seventh Star/
You can take the album folder, cut it and paste into music/B/Black Sabbath directory to group it with all the others or let it like that in your music tree.
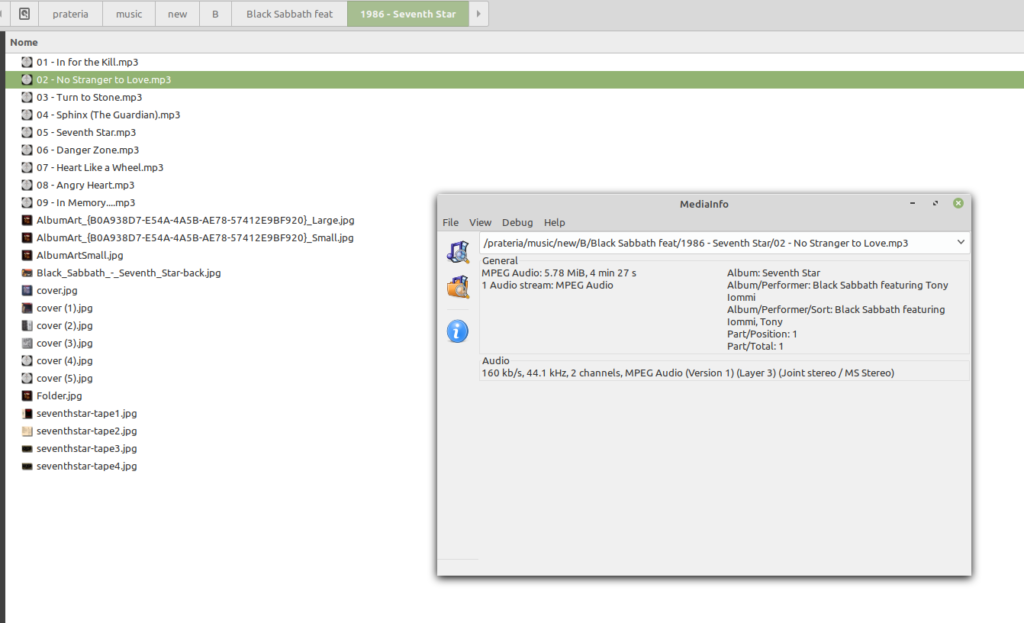
One more thing for this odd case: if you check the file with MediaInfo you will see that the artist name is the one that Picard decided to be, i.e. Black Sabbath featuring Tony Iommi. This will create two Black Sabbath folders in Kodi.
How to fix this? Find a tag editor (I use EasyTAG in Linux, but others exist) and rename the Artist manually for the case being. Then move it into the right Artist folder, namely Black Sabbath.
Before:
<>0010-12 immagine<>
After:
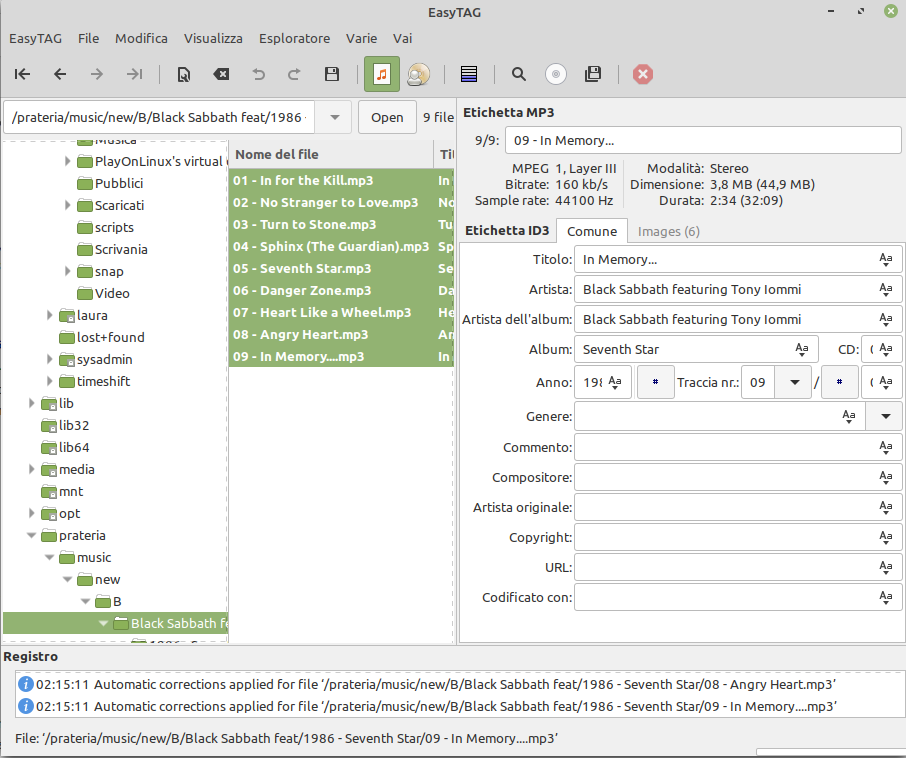
Then you are done. Applying this to all your files shall guarantee you the necessary coherence to have a clean Kodi library.
Import everything in Kodi and check the results yourself.
Hope you enjoyed the reading and I will be glad to read your comments as well. You can subscribe if you want to dig more into more details writing me a message.
Auf wiederloege
Alex